
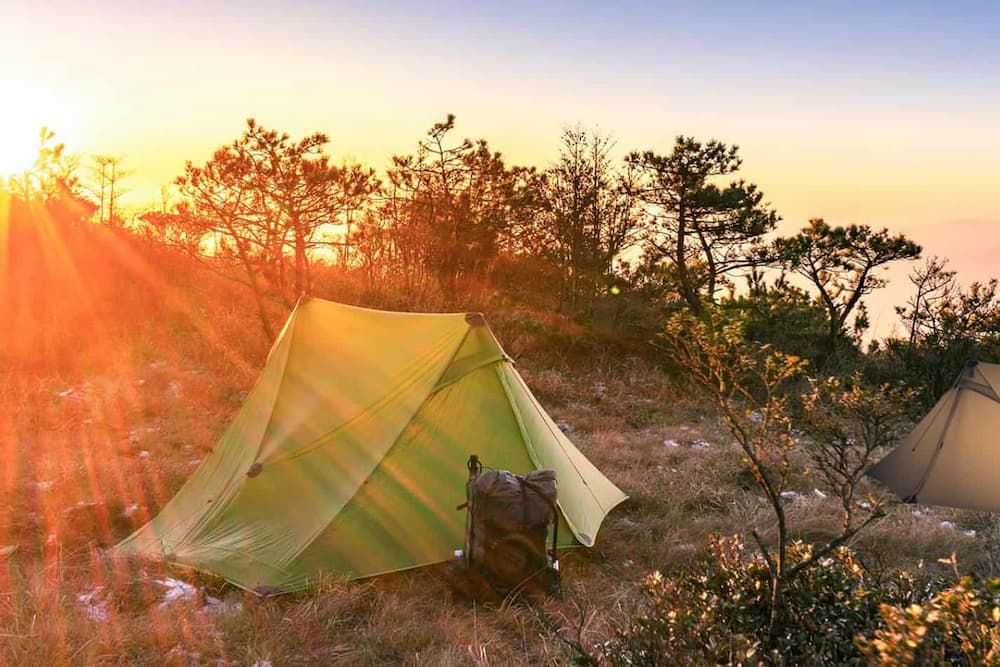
You’re standing in your garage, staring at that heavy 6-pound tent you bought years ago, and suddenly the idea of shaving pounds off your pack weight sounds incredibly appealing. Enter the 3F UL Gear Lanshan series, two budget-friendly shelters that have taken the ultralight backpacking community by storm. But when you’re choosing between the Lanshan 2 and the Lanshan 2 Pro, the decision isn’t as simple as “lighter is always better.” Let me walk you through everything you need to know to make the right choice for your first ultralight shelter.
What Makes the Lanshan Series Popular Among Budget Backpackers
Before we dive into the nitty-gritty comparison, let’s talk about why these tents have become the go-to recommendation for beginners exploring ultralight backpacking. The Lanshan series offers something rare in the outdoor gear world: genuinely lightweight performance at a fraction of the cost of premium brands. While a ZPacks Duplex or similar shelter might set you back $600+, you can get into a Lanshan for a fraction of that price.
Both the Lanshan 2 and Lanshan 2 Pro are two-person tents that use a trekking pole setup, which means you’re using poles you already carry to pitch your shelter instead of carrying dedicated tent poles. This is your first taste of the “multiuse gear” philosophy that defines ultralight backpacking. The tents are made from silnylon (silicone-coated nylon), which offers a solid balance of weight, durability, and weather resistance for the price point.
What really matters here is that these aren’t just “cheap” tents, they’re thoughtfully designed shelters that happen to be affordable. These tents have proven themselves on thru-hikes including the PCT and AT, demonstrating they’re legitimate options for serious trail use, not just weekend warriors.
Lanshan 2 vs Pro: The Key Differences That Actually Matter
Weight and Capacity Specs
Here’s where we get specific. The Lanshan 2 is the original design, a double-wall, two-person tent that weighs approximately 2.5 lbs with stakes and guy lines. The Lanshan 2 Pro is the minimalist evolution, a single-wall, two-person shelter that drops a solid half-pound off the standard version while providing the same protection and even slightly more interior space.
Double-Wall vs Single-Wall Construction
The “double-wall” versus “single-wall” distinction is the most significant difference between these tents. The Lanshan 2 has two layers: an inner mesh tent body and an outer rainfly. This creates an air gap that significantly reduces condensation inside your tent. The Lanshan 2 Pro combines these into one layer, the tent fabric itself is waterproof and serves as your only barrier against the elements.
This single-wall design means you’ll deal with more condensation issues on the Pro, especially on humid nights or when pitched near water sources. However, the trade-off is that lighter weight that makes a real difference when you’re covering big miles.
Interior Space Comparison
Both tents officially sleep two full-size adults, though hikers over six feet will want to sleep corner-to-corner to maximize head and toe space. The Pro actually offers more length and width, making it easier to fit two adults comfortably. If you’re hiking solo in either tent, you’ll have plenty of space for yourself and all your gear to layout and dry out or just stretch those exhausted muscles.
The Lanshan 2 provides 7 square feet more floor space in practical terms, and several inches more peak height. Both tents feature a pyramid-style design similar to the ZPacks Duplex, with two doors (one on each side) and two vestibules, so if two people share the tent, they each have their own storage, entrance, and exit.
Materials and Build Quality
The Lanshan 2 uses 15D silnylon for the floor and 20D silnylon for the canopy, lightweight but proven fabrics. The Pro upgrades to 20D silnylon throughout, from fly to floor, making it actually more durable than the standard version despite being lighter.
One critical difference: the Lanshan 2 Pro requires manual seam sealing. The standard Lanshan 2 typically comes seam-sealed (though you should always test before heavy rainfall). If you don’t want to bother with sealing all the seams yourself, the regular Lanshan 2 is the better option right out of the box.
Weight and Packability: Understanding the Trade-offs
The Real-World Weight Difference
That half-pound weight savings on the Pro might not sound revolutionary, but when you’re thru-hiking, those pounds add up over time and add to the abuse your body takes. If you’re trying to get your “big three” (shelter, sleeping system, backpack) down to six pounds total, removing a half-pound from your shelter for the same cost is a no-brainer.
Hidden Weight Considerations
However, weight isn’t just about the number on a scale. The Lanshan 2’s extra weight comes with benefits: better ventilation means you’re carrying less moisture from condensation, and the mesh inner wall provides a more comfortable sleeping environment. The Pro saves you weight upfront, but you might deal with droplets hitting you during windy or rainy nights due to condensation buildup.
Pack Size Reality Check
The space in your pack is also at a premium, having a smaller tent allows your backpack to be smaller in overall size and weight, which helps you drop further into the “ultralight” range. Both tents pack down efficiently and can fit into a compression stuff sack easily, though some users report replacing the included bag with a larger compression sack to speed up packing with cold hands.
For beginners, here’s the critical insight: if you’re currently carrying a 5-6 pound traditional tent, either Lanshan will feel revolutionary. The question isn’t whether to go ultralight, it’s how ultralight to go on your first step into this world.
Setup and Livability: What to Expect on the Trail
Learning Curve and Setup Time
Setting up a trekking pole tent feels awkward the first time. You’ll fumble with the guy lines, get the tension wrong, and probably end up with a saggy shelter. By your third setup, it’ll take five minutes. Even in abysmal weather, you can get it down to four to seven minutes.
The Pitching Process
Both tents pitch identically: peg out the main four corners with the provided stakes (which are clones of MSR Groundhogs). Then set your trekking poles to 120cm to get the right height on the peak, insert the handle up into the reinforced pad just above the door, and peg out the guy line to hold the pole upright. Repeat for the other pole, then tighten up the main pitch.
Critical note: Silnylon tends to relax over time, so expect to retighten after 30-60 minutes. The tension created by all the pegs and poles working together keeps the tent upright, but only when assembled correctly. Spots like sand or hard-to-penetrate ground will need rocks or other tricks if stakes won’t bite.
Precision Requirements
The Pro is reportedly easier to pitch when you remove the inner from the overall setup compared to the double-wall system. However, single-wall tents require proper staking and tensioning to prevent the walls from touching you (which compromises waterproofing through “wicking”).
Staking Flexibility
The tent can be set up on calm days with as few as six pegs to get the shape right, though when it’s windier or rain is expected, use all 10 stakes to ensure it stands and there’s no late-night collapse from outside pressure.
Interior Comfort and Usability
Inside livability is where the Lanshan 2 really shines. That mesh inner wall means you can see out while staying bug-free, and the design provides better protection from condensation. The Pro feels more streamlined: lighter and more efficient, but you’re trading comfort for weight savings.
Vestibule and Storage Space
Both tents have generous vestibules for gear storage, essential when you’re trying to keep your pack and boots dry. The double vestibule setup (one on each side) works perfectly for solo hikers or pairs, giving everyone their own space.
Durability and Weather Performance for Beginners
Realistic Longevity Expectations
Let’s be honest about what you’re getting at this price point. These tents have stood strong against strong winds, pelting rain, Texas-style storms, and massive sweltering heat in real-world use. Users report taking these tents from the cold and rain on the Ouachita Trail to the humid moisture of the Lone Star Hiking Trail without failures. Multiple seasons of reliable use are realistic with proper care.
Silnylon Care Requirements
The silnylon fabric does require some learning. It stretches when wet, so you’ll need to retension your guy lines during rain. It’s also vulnerable to UV damage over time, meaning you shouldn’t leave these tents set up for weeks. These are backpacking shelters, not basecamps. Avoid sharp rocks when siting, and don’t over-tension the guy lines.
Condensation Management
Weather performance is where the trade-offs become real. There isn’t much Lanshan 2 condensation issue if you don’t pitch close to water sources like streams, rivers, or lakes. If you do camp near water, leave doors open to allow more airflow.
The Pro will have more condensation challenges, single-wall physics means warm, moist air from your breathing condenses on that tent wall, and there’s no secondary barrier to catch it. On humid or rainy nights, expect some droplets. This is the price you pay for that weight savings.
Four-Season Considerations
One major advantage of the standard Lanshan 2: you can purchase a replacement 4-season inner tent to convert it for winter camping. This option doesn’t exist for the Pro, making the standard version the only choice if you need four-season capability. If winter camping is in your plans, this alone might decide the purchase.
Wind and Storm Performance
Both tents handle wind well when properly pitched with all stake points secured. The pyramid design is inherently stable, and the trekking pole setup is bomber when tension is correct. In serious storms, the Lanshan 2’s double-wall advantage becomes pronounced, you can zip up completely and maintain airflow through the mesh.
Color and Visibility Considerations
The tents come in multiple color options including brown, green, yellow, red, and white depending on the vendor. If you plan on blending into the wilderness and prefer a low profile, avoid the white option, it stands out in nearly any environment and glows substantially in the dark with any light source.
Which One Should You Buy?
Choose the Lanshan 2 If:
- This is your first ultralight shelter and you want more room for error
- You backpack in humid climates or frequently camp near water sources
- You don’t want to deal with seam sealing all the seams yourself
- You value better condensation management and that mesh inner wall
- You need four-season capability with the option to swap inner tents
- You’re transitioning from traditional camping and want something that still feels like a “tent”
Choose the Lanshan 2 Pro If:
- You want to cut as much weight as possible while maintaining a budget
- You’re comfortable seam sealing the tent yourself before use
- You primarily camp in drier conditions or above treeline
- You want the slightly larger interior dimensions for taller hikers
- That half-pound weight savings matters for your thru-hiking plans
- You’ve tested single-wall tents and know what you’re getting into with condensation
The Honest Recommendation
For most beginners reading this article, the honest answer is the Lanshan 2. You’re already making a massive upgrade from traditional tent weights, the standard version gives you proven reliability, easier maintenance, and more versatility for weather conditions. It’s been the starter tent for countless backpackers and has survived thru-hikes without issue.
The Pro makes sense when you’re trying to get your big three into that six-pound range and every ounce counts. If you’re planning a thru-hike where that half-pound will be carried over thousands of miles, the Pro’s weight savings become significant. But for weekend warriors and those just entering ultralight backpacking, the standard Lanshan 2 offers more forgiveness.
Making Your Purchase Decision
You’ve made it this far, which means you’re serious about upgrading your shelter system and embracing lighter loads on the trail. Whether you choose the Lanshan 2 or 2 Pro, you’re making a smart investment that will enhance hundreds of hours on the trail.
The beauty of these tents is that you can afford to make a “mistake” and switch later if your needs change. Buy the Lanshan 2 for your first season, and if you find yourself obsessing over every ounce while thru-hiking, grab a Pro for your next long trail.
The price point makes experimentation possible without breaking the bank.
Where to Find the Best Deals
These tents are frequently sold under other brand names on sites like Amazon, with MIER ultralight tent being the most common rebrand. These are the same tents and sometimes come at significant discount prices. You can also find them on AliExpress from multiple vendors if you’re willing to wait for international shipping, often at even better prices than domestic retailers.
Footprint Considerations
While both tents have footprints you can purchase specifically for them, you’ll be better off cutting a footprint from a sheet of Tyvek or Polycro to size. This ensures a much lighter weight layer for protection that takes up less space in your pack, a common ultralight trick that saves both weight and money.
Right now, you have enough information to make a confident choice. If you’re still torn, default to the Lanshan 2, its versatility, easier maintenance, and four-season option will serve you well as you develop your ultralight skills. Ready to cut that pack weight and start covering more trail miles with less effort? Pick the tent that matches your actual needs and tolerance for condensation, and get out there. Your back will thank you on mile fifteen.